• Skip to primary navigation
  • Skip to main content
  • Skip to primary sidebar

PreKinders

Ideas for Pre-K & Preschool Teachers

  • Home
  • About
  • Contact
  • Terms of Use
  • Help
    • Printing Help
  • Shop
  • Learning Areas
    • Literacy
    • Math
    • Science
    • Art
    • Music
    • Fine Motor
    • Christian Activities
  • Themes
  • Teaching Ideas
    • Centers
    • Teaching Tips
    • Assessment
    • Back to School
    • End of Year
  • Printables
    • Literacy Printables
    • Math Printables
    • Science Printables
    • Music Printables
    • Visual Discrimination Printables
    • Classroom Management Printables

12 Favorite Tips for Teachers

By Karen Cox | Affiliate Disclosure | Filed Under: Teaching Tips

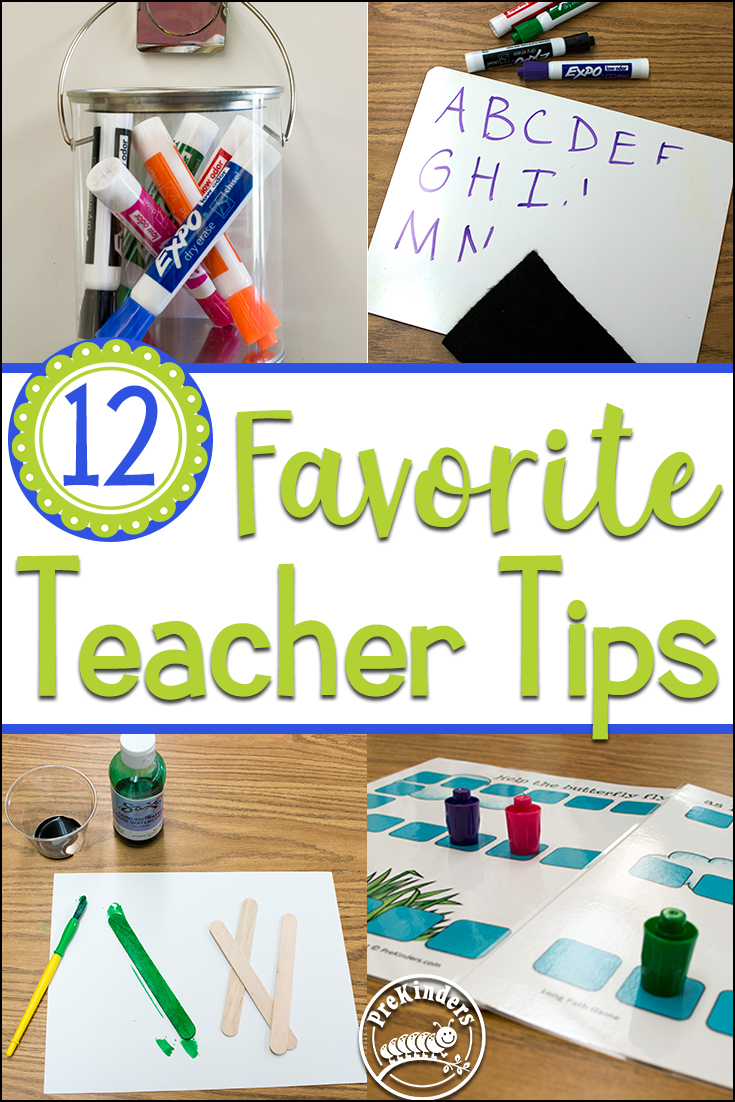
Here are a few of my favorite teacher tips! Some of these you may have heard of, some maybe not. Please add your own helpful tips in the comments section below! We can all help each other out.
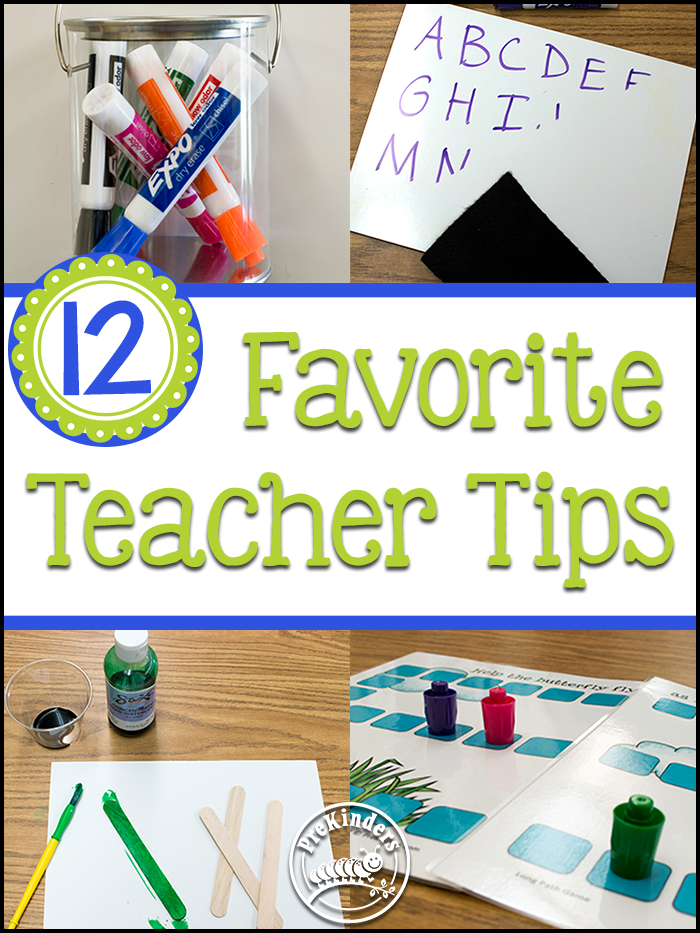
12 Favorite Teacher Tips by PreKinders.com

1. Use felt scraps for dry erase lapboard erasers.

I cut felt scraps into squares for the children to erase their lapboards. They work great and are very inexpensive! I’ve also heard of teachers using socks to erase them.
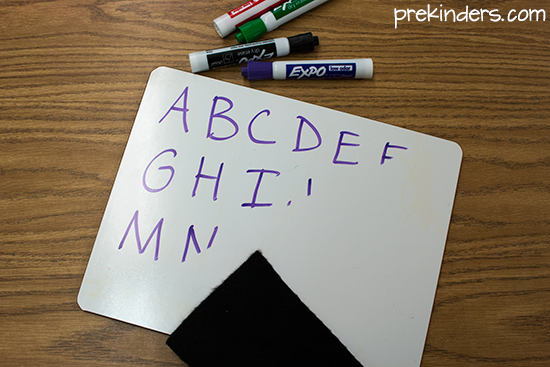
Teacher Tip: Felt squares for dry erase boards

2. Remove permanent marker with a dry erase marker.

If you get permanent marker on a dry erase surface, just color over it with a dry erase marker and it will wipe clean. If all doesn’t come off, try doing the same thing again. This also works for old dry erase writing that won’t come off.
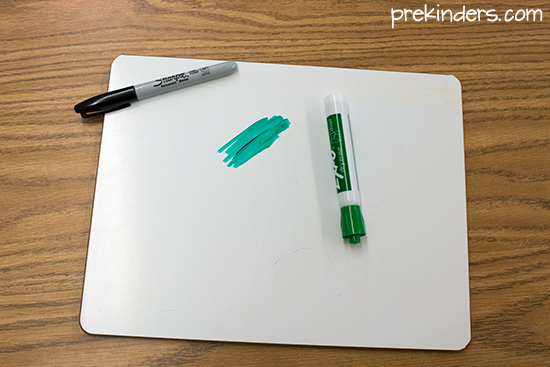
Teacher Tip: How to remove permanent marker

3. Keep markers upside down.

I keep the markers the kids use as well as my dry erase markers for the whiteboard upside down to make them last longer. It’s all about gravity. If you store them right side up, the liquid ink in the marker in going to flow down to the wrong end. Turn them upside down, and the ink will flow towards the tip.
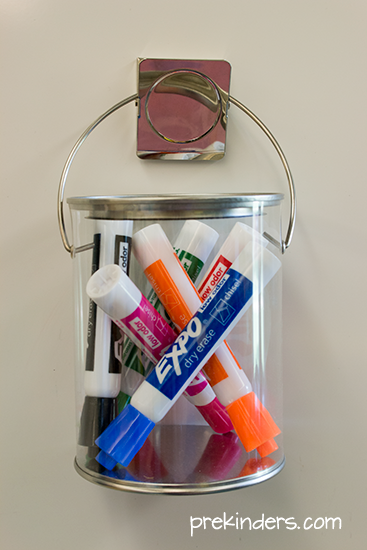
Teacher Tip: Keep markers upside down

4. Wet your dried out markers.

If you have a marker that has dried out, just wet the tip with a couple of drops of water, close the cap, and let it sit overnight. The marker will work the next day. This only works for water based markers.
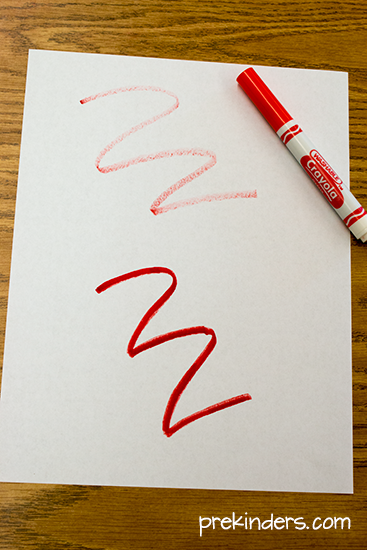
Teacher Tip: Wet a dried out marker

5. Dry erase marker caps make perfect game pieces.

Save those colorful caps from dry erase markers. They make the perfect game pieces for path games! Each child can choose their own color.
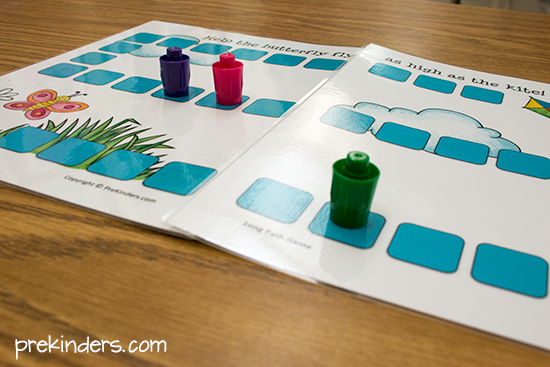
Teacher Tip: marker cap game pieces

6. Keep a pile of roster lists.

This is one thing I use all the time in my classroom. I have a roster of the children’s names and make lots of copies to keep in a stack. When I need one, I just grab one from the stack. These lists can be used to keep track of all kinds of things. When children turn in money, I grab a roster list and as kids bring it to school, their name is crossed off. I use it for school pictures turned in, school T-shirts bought, track whose progress reports I’ve done, cross kids off as I put them in small groups — numerous things.
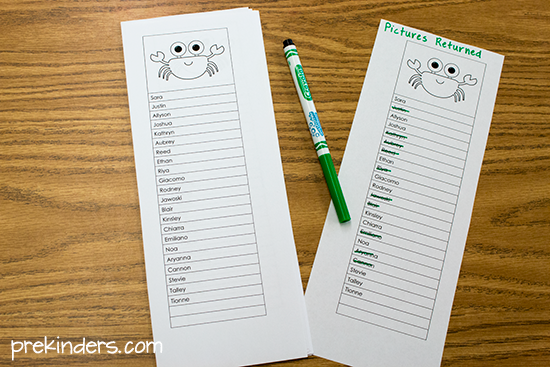
Teacher Tip: keep roster lists to quickly cross off

I’m including a downloadable Word Doc template of this file. Just type your students’ names into both columns, insert a clipart at the top if you choose, and print. Make several copies and cut them in half.

Download: Checklist Roster Sheets (DOC)

7. Keep track of who had a turn.

I have a “Who Had a Turn Folder” that I keep near my large group area to keep track of who had a turn. When we do a song or game where kids get to take a turn to participate, I write down who had a turn so the next time we play the game or song, I’m sure to choose kids who have not had a turn. Often I stick a sticky note inside the folder and write down the names of the kids who had a turn, but you can also use the roster list mentioned in #6.
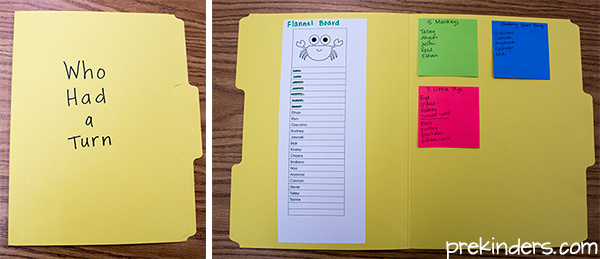
Teacher Tip: Keep track of who had a turn

8. Add Vaseline to your glue caps.

Glue bottle caps tend to get clogged and the kids can’t squeeze the glue out. When the bottles are brand new, pop off the caps, and smear a glob of Vaseline in the cap with a Q-tip. Snap the cap back on and your glue bottles won’t clog. My glue bottles last the whole year.
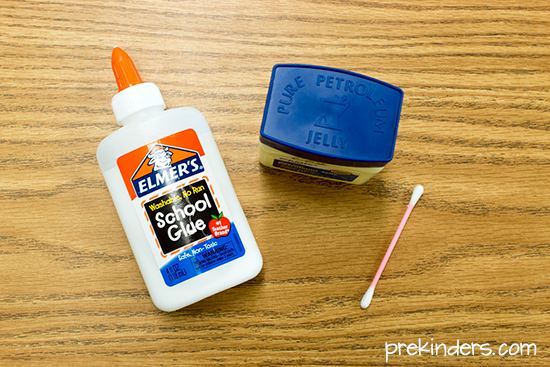
Teacher Tip: vaseline in glue caps

9. Take a playground basket to recess.

I have a playground basket that always goes out to the playground with us. The main things I have in it are tissues and bandaids. Some schools may require you to take a First Aid kit onto the playground, but tissues and bandaids are the minimum. We pretty much use those two items from our basket every single day.
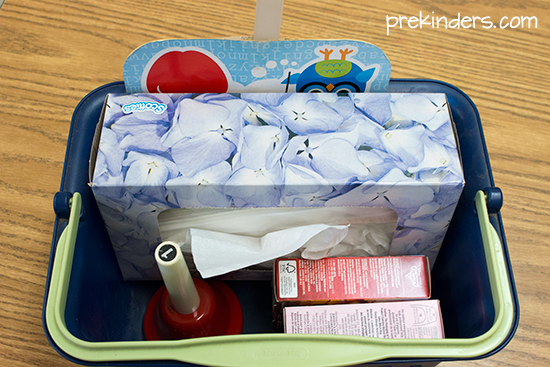
Teacher Tip: Make a playground basket

10. Use mesh bags for washing manipulatives.

To clean manipulatives like Unifix cubes, counting bears, Legos, and similar small items, put them in a mesh bag to disinfect them. I’ve heard of teachers putting the bag of manipulatives in a dishwasher, however we don’t have a dishwasher at my school. I’ve found the easiest thing to be to put a little bleach in a bucket of water and put the mesh bag of manipulatives down in the bucket. Then the bag can be hung on a fence to dry in the sun. (Of course, I do this when the kids are not at school because of the bleach.)

11. Dye your own craft sticks.

If you need a certain color of craft sticks for a project, such as a craft stick Christmas tree or a Mother’s Day picture frame, there’s no need to buy colored craft sticks. Just take your plain craft sticks and dye them yourself. You can paint them with liquid watercolor or with bingo markers. Bingo markers might be the easiest, but I really like the vibrant color of the liquid watercolor.
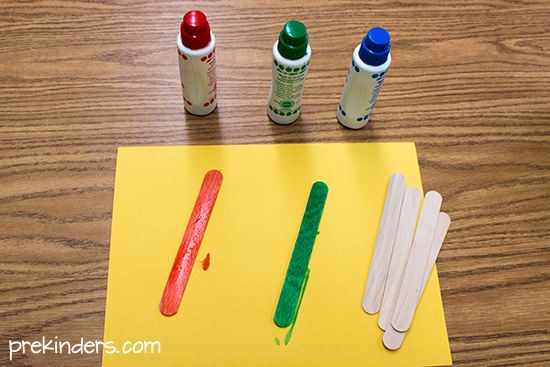
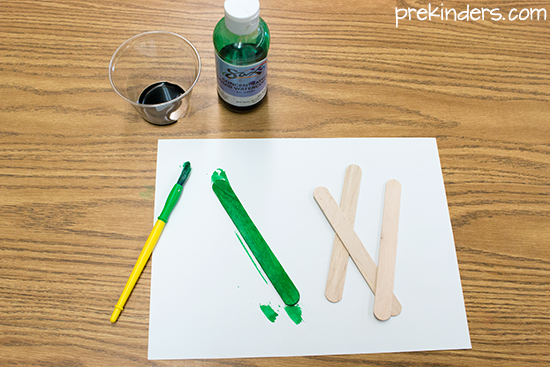
Teacher Tip: how to dye craft sticks
Teacher Tip: color your own craft sticks

12. Put sandwich bags in your paint cups.

I had a picture of my paint cups in my post about covering my art easel and several people noticed the plastic bags in my paint cups. Buy either ziplock sandwich bags or the bags without a zipper on top, line your paint cups with the bags, and fill the cups with paint. When the paint runs out, pull out the bag and throw it away. No mess to clean up!
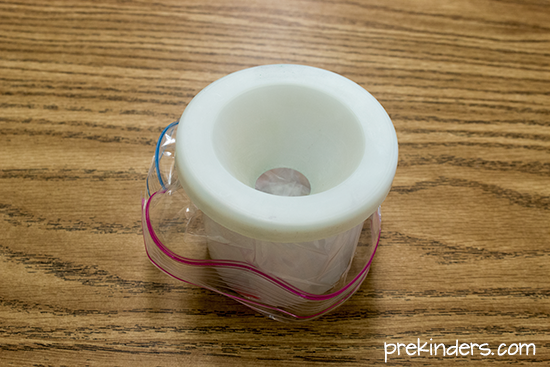
Teacher Tip: plastic bag in paint cups

Remember to add your own helpful teaching tips in the comments below!

12 Favorite Teacher Tips by PreKinders.com

SaveSaveSaveSave

Get FREE updates!
Join here to get weekly emails with free printables and activities for Pre-K!
We collect, use, and process your data according to our Privacy Policy.
Don't worry - we never sell or share email addresses!

42 Comments

About Karen Cox

Karen is the founder of PreKinders.com. She also works as a full-time Pre-K teacher in Georgia. Read more...

Reader Interactions

Comments

  1. Amy @ Magic Moments Preschool says

    August 20, 2015 at 8:57 pm

    Fantastic tips. Thanks so much for compiling this list. I love the idea of storing markers upside down, genius! I also appreciate the link you gave for your roster lists. I can tell you have lots of experience in the classroom. Thanks

    Reply
    • Kathi says

      January 13, 2019 at 11:31 pm

      I put the marker caps in a margarine tub partially filled with plaster of Paris. (Make sure the caps are positioned to hold the markers upright when the plaster hardens.) Once the caps are secure, you can store the markers upside down and never lose the caps.

      Reply
  2. Cecily Macgregor says

    August 20, 2015 at 10:11 pm

    Ive been teaching for two years so these tips have been very helpful !

    Reply
    • Karen Cox says

      August 20, 2015 at 10:12 pm

      Glad to hear it! I knew there would be some new-ish teachers out there who could benefit!

      Reply
      • ono-asi says

        September 2, 2015 at 7:46 pm

        Hello Karen, I just got a job to start teaching pre-kindergarten (first time teacher), and your site has been sooo helpful. …..thanks for sharing.

        Reply
      • Tammie Burg says

        August 22, 2017 at 8:03 am

        hi Karen, even us veteran teachers can benefit from these helpful tips! Thank you so much for sharing!

        Reply
      • Paula says

        June 10, 2018 at 10:16 pm

        I like your idea of plastic in cup of paint. I use the egg cartons cut the twelve egg holders apart to make cups for the paint, when done, throw them away

        Reply
  3. Reagan says

    August 21, 2015 at 12:20 pm

    We use dried out markers for “water color painting”. Give each child a small cup of water to dip a marker in and “paint” their coloring pages. Clean up is a breeze!

    Reply
  4. Mawaddah Ismail says

    August 22, 2015 at 6:10 am

    The last one! I’ve never thought of that. Very useful tips. Thank you šŸ™‚

    Reply
  5. Rija says

    August 22, 2015 at 12:52 pm

    nice tips, some really usefull

    Reply
    • Rija says

      August 22, 2015 at 12:54 pm

      #8 is great

      Reply
  6. Terri says

    August 22, 2015 at 6:20 pm

    I will definitely try the Vaseline in the glue top!!! Clogged glue bottles are always a problem!!

    Reply
  7. Amy says

    August 22, 2015 at 11:45 pm

    I use clothes pins with kids names written in permanent marker in several ways:
    1) I hot glue a clothes to a laminated sheet of construction paper. I use these to display completed student work.
    2) I put all of the clothes pins inside a small basket or box. Each time the kids need to go to the restroom, they clip their clothes pin up around the edge of the basket. This allows me to quickly see who is in the restroom, and the kids know to wait if someone is already in the restroom.
    3) I keep another small bin or basket and clip clothes pins with the kids name of them around the edge. I choose a name and invite the child to share something they learned -a journal entry, favorite book, science log discovery, etc.

    Thanks to everyone for sharing great tips!

    Reply
  8. Juli says

    August 25, 2015 at 6:31 am

    Thank you for the tips these will come in handy.

    Reply
  9. Guliya says

    August 25, 2015 at 7:06 am

    Thank you for great ideas. I think that i can use many of them.

    Reply
  10. Barbara says

    August 25, 2015 at 8:14 am

    Thanks so much for sharing these wonderful tips!! I have never heard of putting Vaseline into the glue bottle lids — I LOVE it and will do so this year!

    Reply
  11. Megan says

    August 25, 2015 at 10:06 am

    GREAT tips! I especially love the Vaseline in the glue caps and the sandwich bag in the paint cup!
    =:)

    Reply
  12. Marycarol Stout says

    August 25, 2015 at 12:29 pm

    Use spray sunscreen (the cheaper the better) to remove permanent marker from practically any surface. I laminate all of my nameplates and other places where the kids names are and then reuse every year.

    Also, I do make a few copies of our class roster but I laminate them or place them in page protectors. Then you can use dry erase markers for kids to check off when they’ve been to a center or for when they’ve had a turn or when they bring in money or forms, etc.

    Thanks for all the great tips!

    Reply
    • Tammara Fulmore says

      August 3, 2018 at 11:25 am

      I also use rubbing alcohol for removing permanent marker from anything. It allows me to also reuse a lot of labeled items in my room.

      Reply
  13. liljana says

    August 25, 2015 at 3:11 pm

    Thanks for sharing these useful tips.

    Reply
  14. Lori Pope says

    August 25, 2015 at 3:26 pm

    Love these!!!! I had a question about the vaseline and the glue. Not quite sure where exactly to put it, inside the orange tip or all around the rim or both. Can’t wait to try this. Can’t stand glue bottles that won’t work šŸ™‚

    Reply
    • Karen Cox says

      August 25, 2015 at 6:06 pm

      Inside the orange tip. šŸ™‚

      Reply
  15. Robin says

    August 26, 2015 at 10:54 pm

    It gets really hot in Texas in August. When we go outside for recess, I take a small spritzer bottle outside. When it’s time to line up, they come running because they love for me to spritz their hot faces.

    Reply
  16. Janice Tickner says

    August 28, 2015 at 1:23 pm

    Great tips! I also use old socks for white board erasers. Hand sanitizer will also take off permanent markers. I laminate most of my pieces with the children’s name on them and reuse them every year this way.

    Reply
  17. Toni says

    August 30, 2015 at 12:58 am

    Use Mr. Clean erasers to remove permanent marker from laminated cut outs, name tags, and anything else you want to reuse.

    Reply
  18. Kathy Patterson says

    September 9, 2015 at 8:47 pm

    I use the same method for dyeing craft sticks that I use for rice or pasta. Put them in a zip-top bag with liquid watercolor and a splash of rubbing alcohol. Shake them around until both sides are covered and then dump them out on newspaper to dry.

    Reply
  19. helen says

    September 29, 2015 at 7:01 pm

    Really useful tips..the vaseline tip i will try.. who knew!! Thanks so much..

    Reply
  20. Jillisn says

    October 6, 2015 at 6:12 pm

    Thank you so much for posting such helpful tips! I also put snack/sandwich bags in my paint cups. I look forward to implementing a lot of your other recommendations!

    Jillian

    Reply
  21. Naomi says

    November 1, 2015 at 1:57 pm

    Thanks so much for all the wonderful ideas! We already put sandwich bags into our paint cups and it saves so much time!

    When we do arts and crafts with our JK children, we save odds and ends of construction paper as well as the leftover craft items that aren’t enough to divide among the children for a second craft, (ex. 5 cotton balls, 7 popsicle sticks, etc) and put them aside in a plastic storage box. Every so often, we put out the box on an ā€œimagination tableā€ and let the children make whatever they want with the leftovers. Sometimes their creations are unbelievable!

    Reply
  22. Jazmin says

    December 7, 2015 at 8:34 pm

    Great Ideas! šŸ™‚

    Reply
  23. Felicia says

    December 25, 2015 at 12:09 am

    Karen, do you know what removes the sticky residue from the tape on the wood surfaces? We taped pictures on the wood shelves/surfaces for around one or two months. When we removed the pictures and the tape, the sticky stuff from the tape still stuck on the wood. I tried using credit/gift cards and my finger nail to scrape it out, it took quite a long time, and my fingers were getting hurt. Another thing was that, even I scraped out the sticky residue, there were still a little bit sticky on the surface because I can feel it. We did use some kind of liquid solution to try to remove it, but no luck. I forgot the name of the liquid solution. Please advice. Thank you.

    Reply
    • Karen Cox says

      December 27, 2015 at 9:51 pm

      Hi Felicia! Lemon essential oil works wonderfully, but it can be expensive. You can also use Goo Gone (you can find it pretty much anywhere: Target, Lowes, etc.)

      Reply
      • Julie Copeland says

        August 11, 2016 at 5:14 pm

        hand sanitizer works for this also . .

        Reply
    • Beth says

      November 2, 2018 at 1:55 pm

      Goo Gone is great to remove sticky from surfaces.

      Reply
  24. Charity says

    May 18, 2016 at 4:00 pm

    Great tips! I like to prep a page of stickers by peeling off the giant “sticker” that surrounds all the little ones. It makes it much easier for little fingers to get ahold of the sticker they need and remove it.

    Reply
    • Dawn says

      July 24, 2016 at 8:37 am

      Omw, so simple but will really help the little ones ?

      Reply
  25. abril says

    July 31, 2017 at 11:42 pm

    Great and fantastic tips!!! I love #7 & #9 I“ll use this school year. Thanks for share your knowledges.

    Reply
  26. Astrid says

    June 20, 2019 at 8:14 pm

    Great tips ! Thanks for sharing
    The Mr. Clean magic eraser is also very useful to erase crayon and markers marks on the tables !

    Reply
  27. Magretta Nelson says

    August 7, 2019 at 11:23 am

    You couldn’t possibly know how much of a blessing you are to me! I really want to give my best this school year ,and all of your suggestions and advice has been amazing!!! I love the 12 teaching tips, the calendar time which sounds so much more interactive and meaningful and so much more. I pray many blessings in your life for giving so much of yourself so freely!

    Reply
    • Karen Cox says

      August 9, 2019 at 8:14 pm

      Thank you for the sweet message, Magretta! I hope you have a wonderful year!

      Reply
  28. Connie says

    June 16, 2020 at 1:42 pm

    Thank you for such a wonderful list of tips. I will certainly use them this new school year. What a blessing!

    Reply
  29. Debbie says

    June 22, 2021 at 12:34 pm

    I hot glue a pompom to the lid of expo markers for the kiddos to erase their white board

    Reply

Leave a Reply Cancel reply

Your email address will not be published. Required fields are marked *

Primary Sidebar

Visit My Shop!Ā 

Welcome!

Glad you're here! You'll find hands-on learning activities, themes, and printables for Pre-K, Preschool, and Kindergarten kids. I'm Karen Cox, a Pre-K teacher in Georgia. I have taught 4-5 year olds for 20+ years! Read More…

Before Footer

WE BELIEVE IN HANDS-ON, ACTIVE, & PLAYFUL LEARNINGĀ TO INSPIRE YOUNG MINDS

Serving Pre-K teachers, parents, & kids worldwide since 2000

Get Our Free Weekly Newsletter

  • Contact
  • Free Updates
  • Terms of Use
  • Disclaimer
  • Privacy Policy

Copyright © 2022 Ā· PreKinders.com

Get FREE weekly updates!
Join here to get weekly emails with free printables and activities for Pre-K!
We collect, use, and process your data according to our Privacy Policy.
Don't worry - we never sell or share email addresses!
Get FREE updates!
Join here to get weekly emails with free printables and activities for Pre-K!
We collect, use, and process your data according to our Privacy Policy.
Don't worry - we never sell or share email addresses!